DIY Nail Art: Fun, Affordable Designs for Beginners
- SkyeChanel

- Jun 29, 2025
- 3 min read
Let me just say this—I love having cute nails. What I don’t love? Spending $70+ at the nail salon only to leave annoyed because they didn’t do what I asked. After a few too many “this isn’t what I showed you” moments, I decided to take matters into my own hands—literally.
Lately, I’ve been getting into DIY nail art, and y’all… it’s actually been fun. A little therapeutic even. Not to mention, way easier on my wallet.
Why I Switched to At-Home Nail Art
The biggest reason? Control. I get to pick the colors, the shape, the design—and I can take my time with it. No rushing. No awkward small talk. No surprises at checkout.
Plus, it’s way more creative than I expected. I’ve always liked expressing myself through fashion, so this just feels like an extension of that.
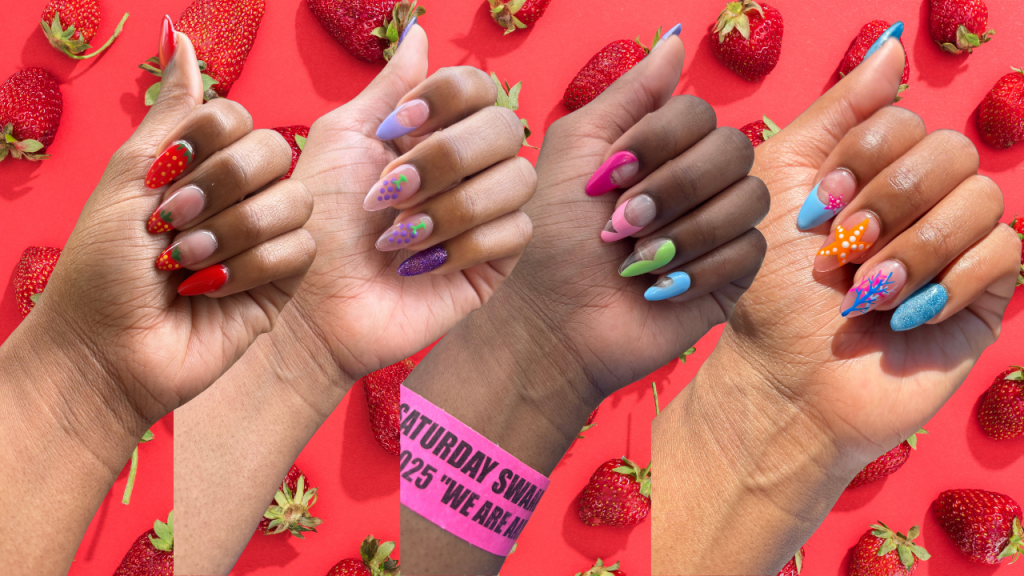
My Favorite Designs So Far
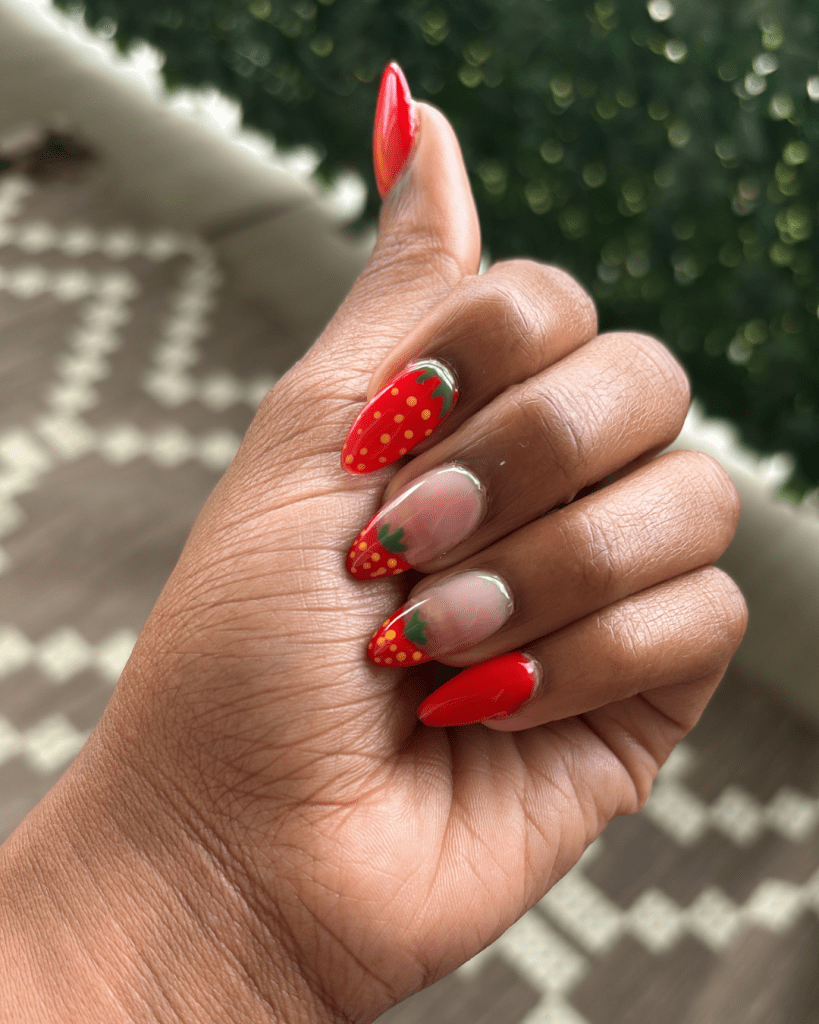
Strawberries – This one’s a favorite. I used red polish with tiny yellow dots for seeds and green tips for the stems. It’s giving summer picnic and I’m here for it.
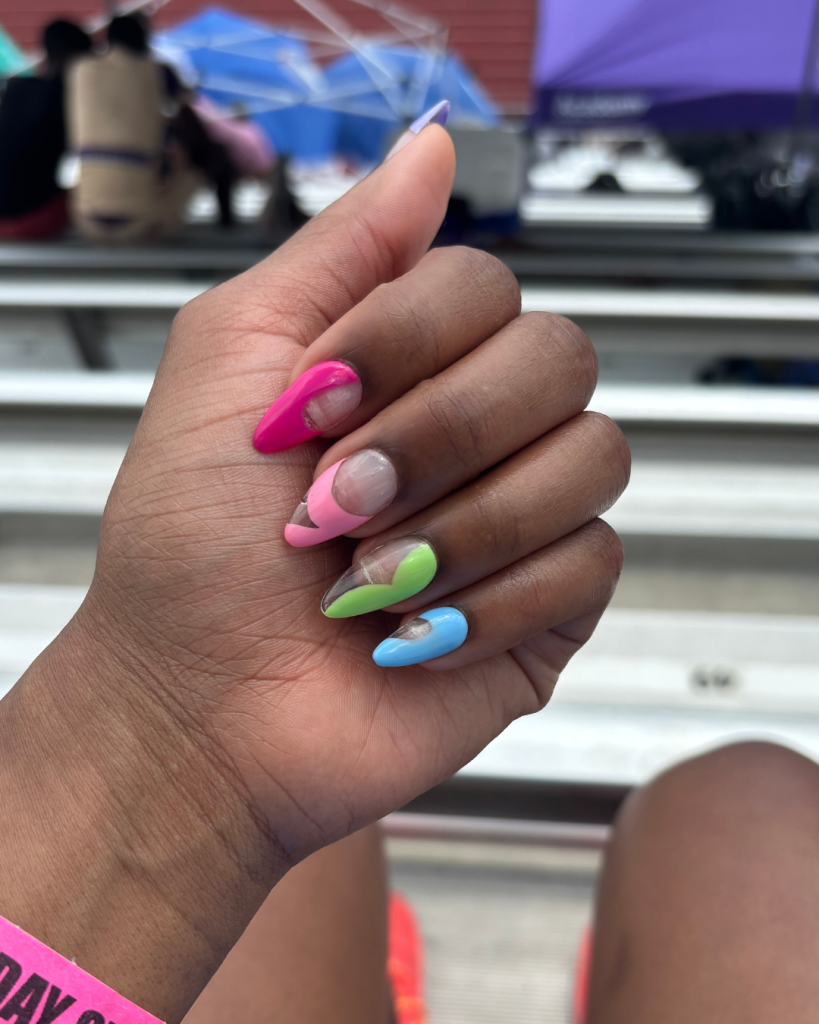
Abstract Art – Probably the easiest to start with if you’re new to nail art. I just swipe on random shapes and colors, kind of like a mini canvas. No rules. And somehow, it always turns out cool.
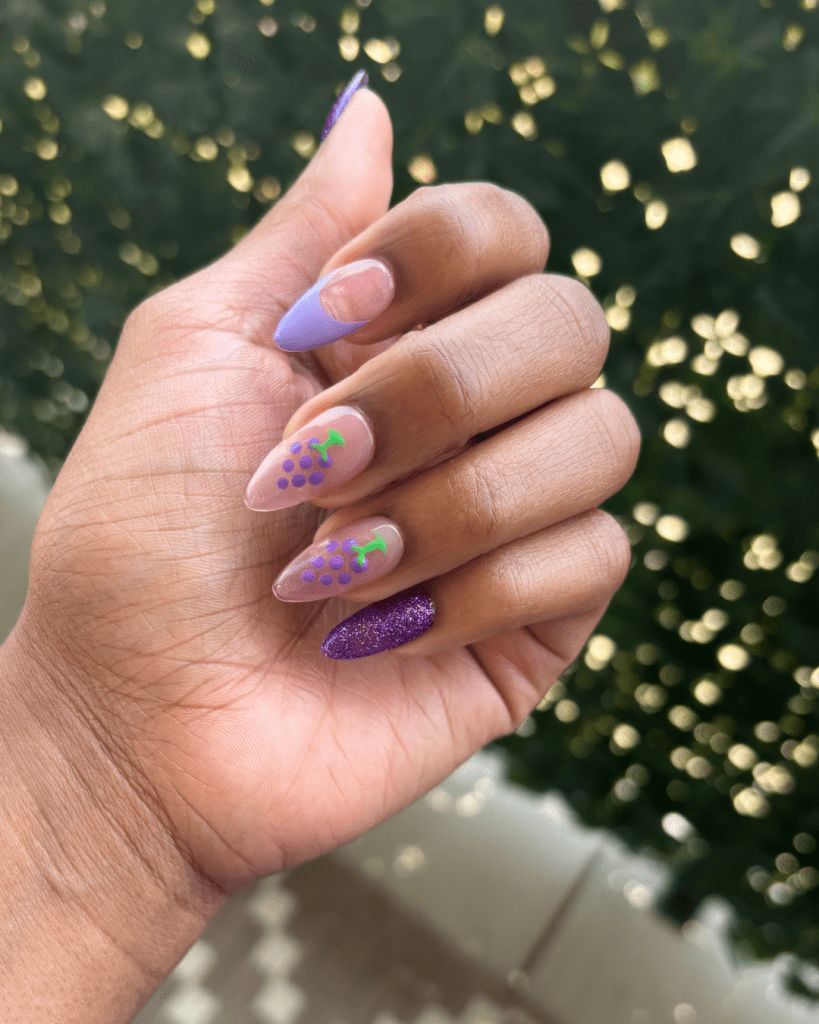
Grapes – I know it sounds random, but they’re so cute! Purple dots, a little green vine, and boom—tiny grape clusters on your fingertips. It gives playful and artsy at the same time.
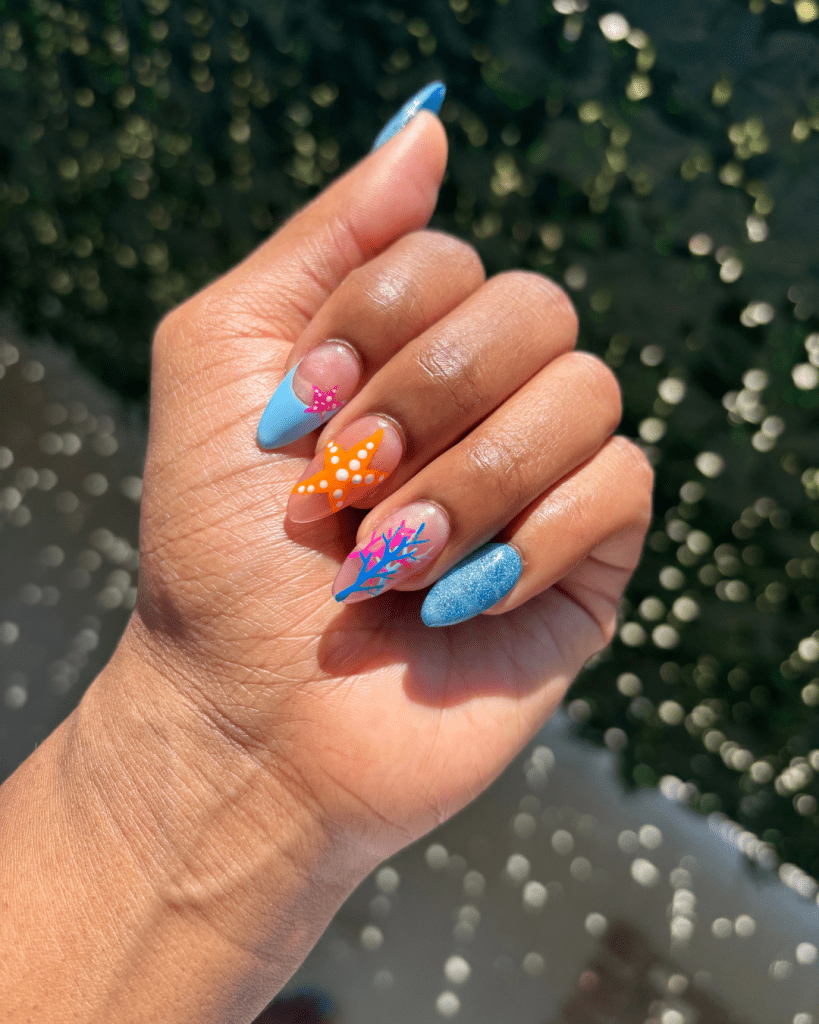
Ocean Nails – These are such a vibe. I use a layering technique that makes it look like you’re looking down into the water—like clear, dreamy waves you could dive into. Think sea glass blues, and swirled depth. On a few nails, I painted tiny starfish with acreate a beach-meets-the-ocean moment with sandy nude polish blending into watery tones. It’s like a whole scene on your fingertips, and it’s honestly one of my favorite designs yet.
Tools I Use
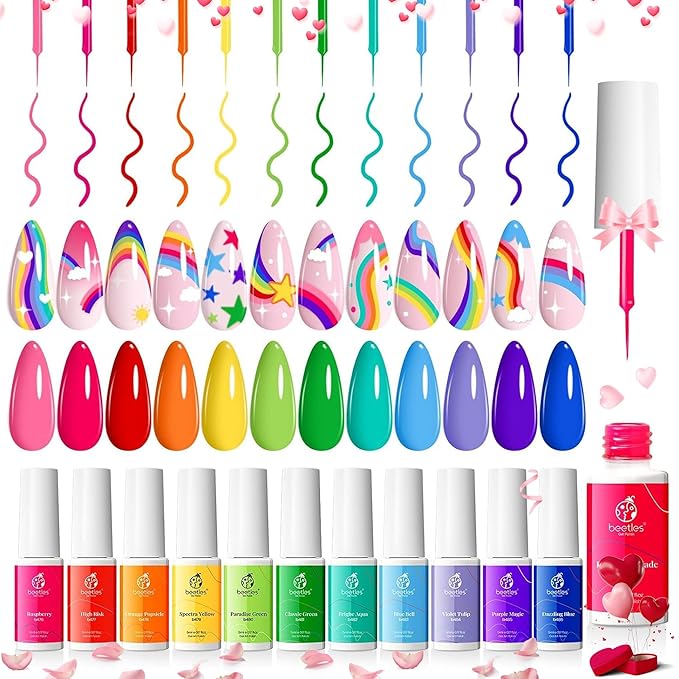

Beetles Gel Polish – These are my go-to! I have way too many colors at this point, but I love that they’re long-lasting and affordable.
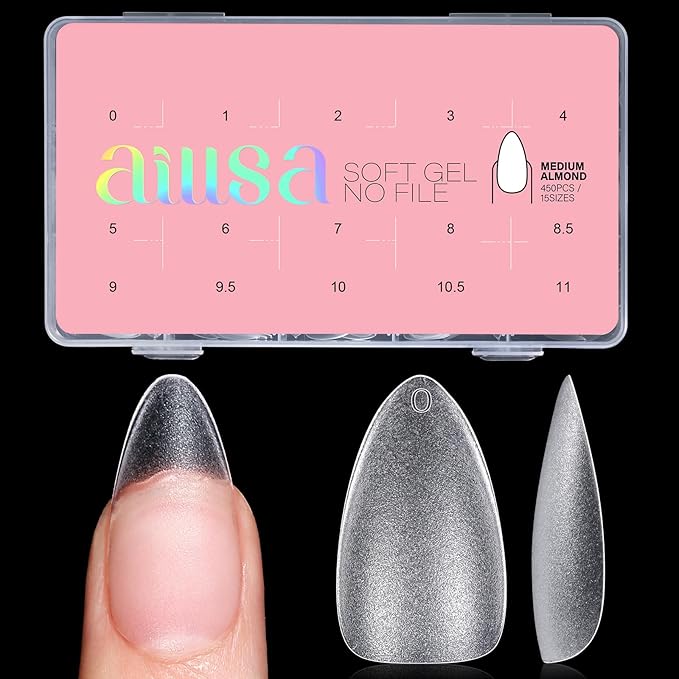
AILLSA Full Tip Clear Nails – I use these as my base for nail art. They’re sturdy, easy to work with, and give me that full-coverage salon look.
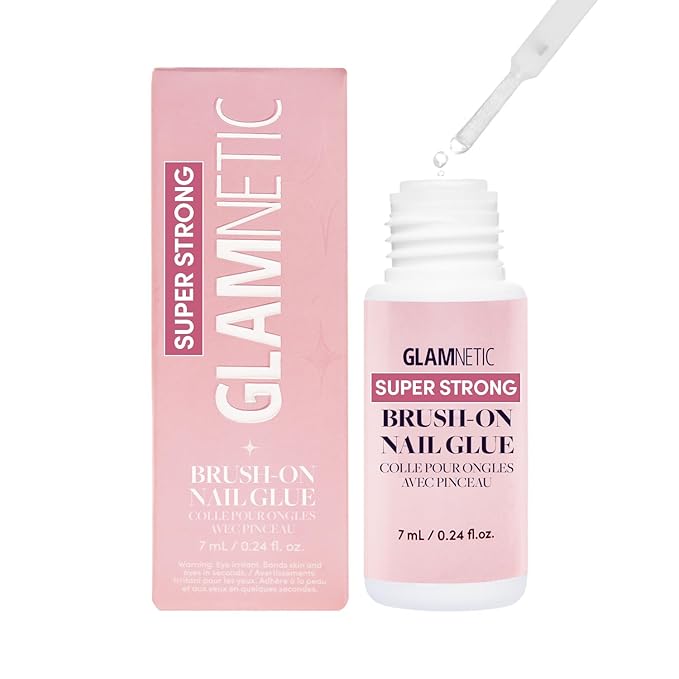
Glamnetic Brush-On Nail Glue – A game changer. It applies like polish and keeps my nails locked in for days (up to 2 weeks). No mess, no fuss.
Nail Dotting Tools – Perfect for fruit shapes or tiny details.
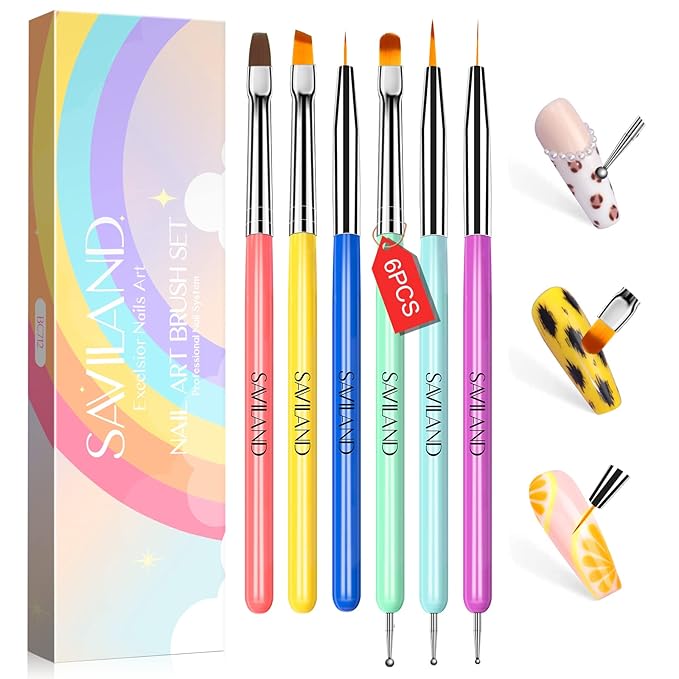
Nail Art Brushes – For lines, swirls, and more precise work.
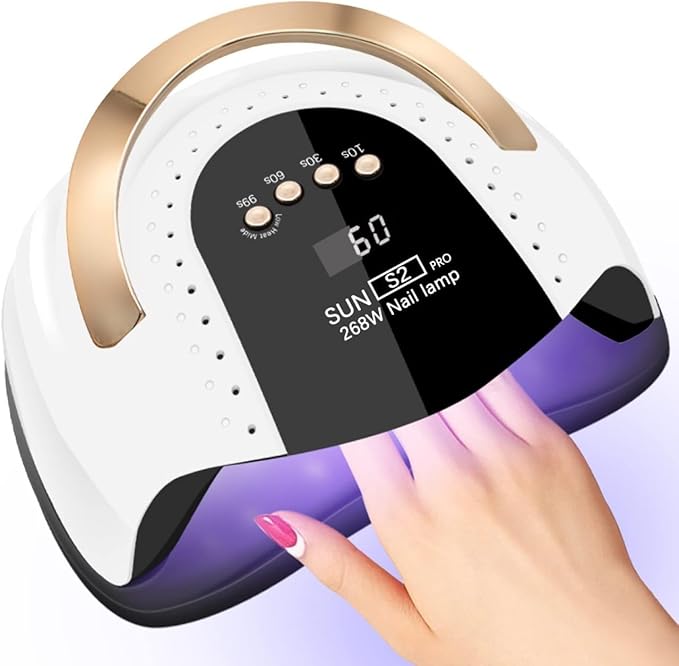
UV Lamp – You definitely need this if you’re working with gel. Totally worth the investment.
Cleanup Brush + 70% Alchohol – Because mistakes happen and clean edges matter.
A Few Beginner Tips
Start with one accent nail if you’re nervous. You don’t have to go all-in right away.
Use Pinterest or Instagram for inspiration (just search “DIY nail art” or “fruit nail designs”).
Be patient! Nail art is definitely a practice-makes-perfect kind of thing.
Final Thoughts
I never thought I’d be the person doing nail art at home, but here I am—saving money and loving the process. If you’re tired of the salon or just want to try something new, grab a few tools and get creative. You might surprise yourself!
Have you tried DIY nails before? Or do you have a design I should try next? Let me know in the comments—I’m always looking for inspo!
Until next time! XOXO -skyechanel

Comments